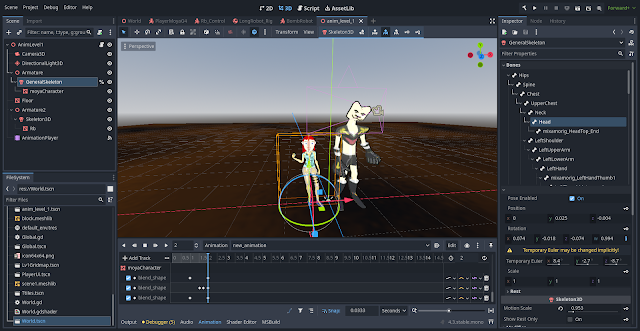
1. Create a new Scene3D. The required nodes are Camera, Light, and AnimationPlayer.
2. In the imported 3D model section, right-click the file and select New Inherited Scene.
3. Copy the nodes of the 3D model group from Armature, Skeleton, and Mesh.
 |
| Copy and paste into the new scene created. |
4. You can make a Cut Scene at the Animation Player node. You have to click on this node first and then click on the node that you want to change the value to be able to press the Key frame or press the key icon.
5. In the part of the bone that needs a Key frame, click to select only one bone. In the Position and Scale parts, you can change the values immediately. But in the Rotation part, you have to change the value in Temporary Euler by clicking on the pencil icon to show the values that can be changed.
Skeleton3D node, then click the cursor icon that overlays the bones. You'll see arrows for moving, circles for rotating, and squares for scaling the bone. After adjusting a bone's transform, you can insert a keyframe by clicking on the bone's name in the panel on the right.6. The mesh section can adjust Blend Shapes values.
 |
| Blend Shapes comes from the Shape keys you made in Blender. |
7. Script part: Just play the animation for 2 seconds before the game starts. When the animation is finished, change the scene to World.tscn to play the game.


No comments:
Post a Comment